0086-519-82305398
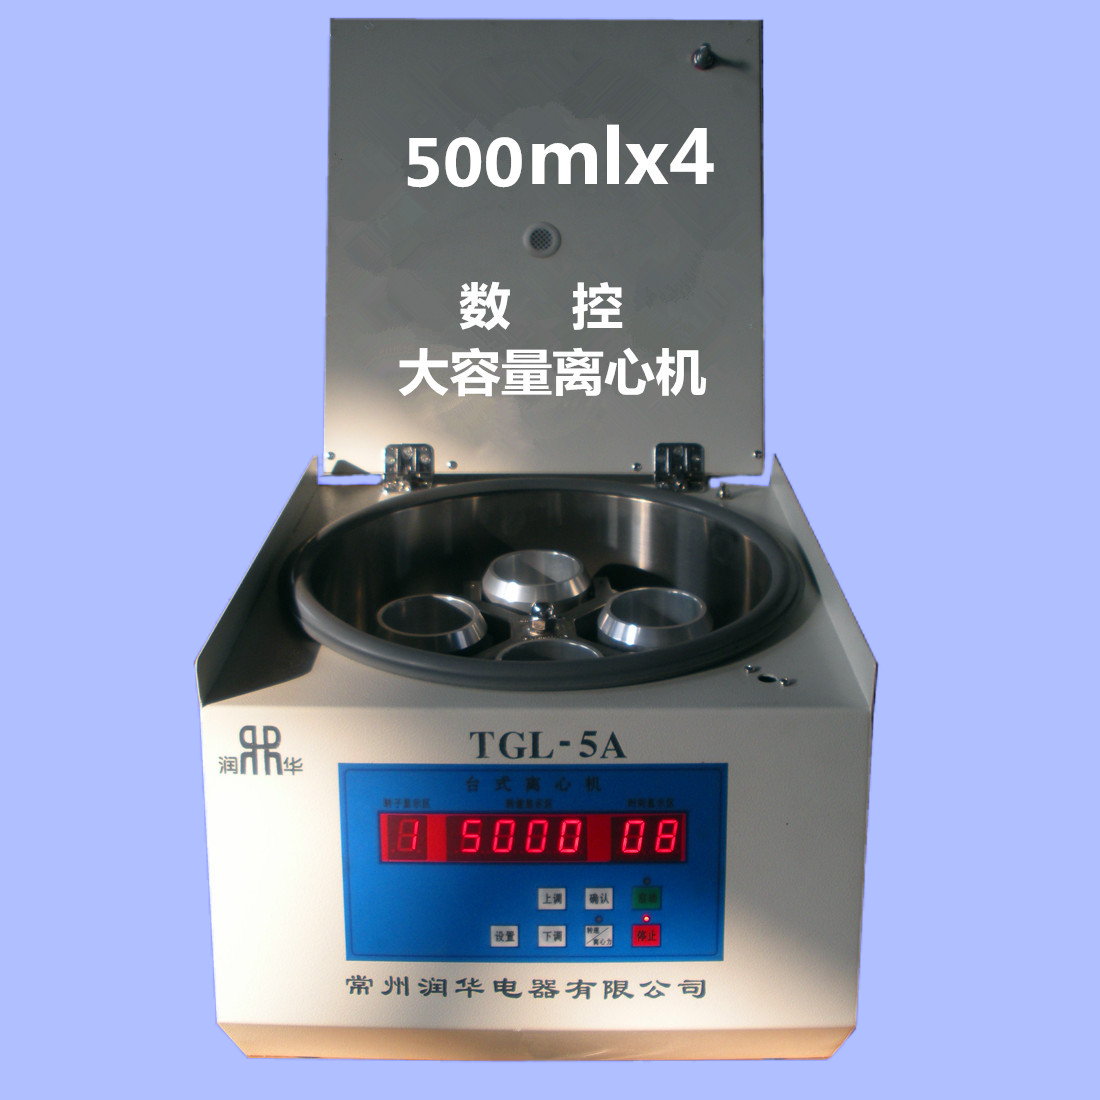
Overview:1、 Features and uses The shell of the machine is made of iron, and the surface is sprayed with plastic, so it has good rigidity, high strength, corrosion resistance and simple modeling. The electrical system uses microprocessor chip control, digital …
Consulting1、 Features and uses
The shell of the machine is made of iron, and the surface is sprayed with plastic, so it has good rigidity, high strength, corrosion resistance and simple modeling. The electrical system uses microprocessor chip control, digital tube display, key operation and DC brushless motor drive, so it has the advantages of small volume, low noise, small temperature rise, high efficiency, safety and reliability. It is suitable for the experimental analysis work with less sample quantity and more separation steps, and is widely used in Colleges and universities, scientific research institutes, pharmaceutical, medical and other units.
The machine can be used safely under the condition that the ambient temperature is 5-40 ℃, the relative humidity is not more than 80%, and there is no conductive dust, explosive gas and corrosive gas around.
2、 How it works
Centrifuge is based on the principle of centrifugal sedimentation to separate, concentrate or purify cells (particles) with different densities in the solution. The centrifugal tube with the same amount of test solution is placed symmetrically in the hanging cup (test tube) around the rotor. After the instrument is started, the relative centrifugal force (RCF) generated by the high-speed rotation of the motor drives the rotor to separate the cells (particles) with different densities in the test solution. The relative centrifugal force depends on the horizontal distance between the sample position and the axis, i.e. the rotation radius R and the rotational speed n As follows:
RCF=1.118×10⁻⁶n2r×g
Speed (RPM)
R -------- radius of rotation (mm)
The time required for separation and precipitation of particles in the mixture is calculated by the following formula:
27.4 × (logerrmax logerrmin) μ TS = minute n2r2 (б - ρ)
Where: Rmax --- the radius of rotation of the test solution farthest from the axis
ρ -------- mixture density (g / cm3)
μ -------- viscosity of mixture (poise)
Speed (RPM)
R --- particle radius (CM)
б -------- particle density (g / cm3)
3、 Technical index
|
Maximum speed |
4000rpm |
Timing range |
0-99mins |
|
Maximum centrifugal force |
2810×g |
Fuse specifications |
10A |
|
Maximum capacity |
300ml |
Electric source |
220V 50Hz |
|
Motor power |
550W |
Weight |
45kg |
|
External dimension |
450×600×380(L×W×H)mm |
||
Equipped with rotor:
|
Program number |
Preparation capacity |
Maximum speed |
Maximum centrifugal force |
|
2 |
5mlx96 |
4000 r/min |
2810 ×g |
|
|
250mlx4 |
4000r/min |
2810×g |
|
|
× ml |
r/min |
×g |
Note: if you do not need to run at the highest speed, please do not run at the highest speed, which has a good effect on the maintenance of the machine.
Speed up and down gear setting:
In the centrifuge stop state, press and hold the "increase" or "decrease" key for three seconds to enter the lifting adjustable mode. Press the "increase key" and the nixie tube shows that "a - ××" represents the up speed gear, and pressing the "decrease key" and "D - ××" represent the down speed gear. Press the "confirm" button to confirm when the speed up and down gear is set, and exit the speed up and down setting mode. Among them, gear 0 is the fastest and gear 9 is the slowest. (and so on)
4、 Operating procedures
1. Place the centrifuge on a solid and horizontal platform, and pay attention to the four feet should be balanced
Force, and then gently shake with your hand to check whether the centrifuge is placed stably.
2. Open the door cover, gently put the rotor on the motor shaft, tighten the nut to make the rotor and motor shaft tightly connected (pay attention to the action should be careful and gentle, avoid large swing and up and down pressure, so as to avoid damaging the flexible support of the motor), and then put the hanging cup (test tube sleeve) into the rotor (in the adapter around), and then rotate the rotor body slightly, and the rotor should rotate It should be flexible, and the hanging cup (adapter) should tilt freely on the rotor without blocking and rubbing.
3. The centrifuge tube with solution, tube sleeve and adapter are weighed with electronic scale, and the weight error is less than 2G to ensure balanced operation. Then place the rotor carefully (note that it must be placed symmetrically).
4. Gently close the door cover and check whether the door cover is locked properly (after closing, gently lift the door cover, the door cover can not be lifted).
5. Plug in the power socket and press the power switch.
6. Set rotor number, speed, time
The instrument control panel is shown in the figure below
Each time you press the select key, the nixie tubes in the rotor, speed and time window will flash in turn. The window that is flashing is the window for entering the setting.
(1) Set the rotor number: press the select key. When the nixie tube in the rotor window flashes, it will enter the rotor number setting, and then press the plus or minus key to select the rotor number for this operation.
Special reminder: the set rotor number must be consistent with the configuration specification of the used rotor (different rotation
The speed up curve of sub number is different, and the maximum speed limit is not necessarily the same). For the corresponding relationship between the rotor number and the rotor configuration specification, see the column of "equipped rotor" in [technical index] of this manual.
(2) Set the speed: press the select key. When the digital tube in the speed window flashes, it will enter the speed setting, and then press the plus or minus key to determine the speed of this operation.
Special reminder: when the horizontal rotor and different adapters form different configuration specifications, there are specified rotor number (and maximum speed limit). When setting the speed parameters, users must strictly abide by the speed limit regulations in the column of "equipped rotor" in the [technical index]. Overspeed operation is strictly prohibited to ensure operation safety.
(3) Setting time: press the select key. When the digital tube in the time window flashes, the time setting is entered. Then press the plus or minus key to determine the running time.
(4) When the above steps are completed, press the "approval key" in time to confirm, otherwise the set value will be automatically eliminated and restored after 8 seconds of flashing.
7. After checking the above settings, press the "start" key to start the operation of the instrument.
To know the centrifugal force value during operation, press the "speed / centrifugal force" key, the yellow light will be on, the window will display the centrifugal force under the current speed, and then press this key to restore the speed display.
8. When the running time is counted down to "0", the centrifuge will stop automatically. When the speed is 0, the buzzer will sound. Press the "approve" key to cancel the call. In case of emergency during operation, the buzzer will not sound when the centrifuge stops running.
9. After confirming that the rotor stops completely, the door cover can be opened and the centrifugal tube can be taken out carefully to complete the whole separation process.
10. Turn off the power switch and cut off the power supply of centrifuge.
11. In case of sudden power failure, the electronic door lock of this machine can be opened by gently pressing the door cover with one hand and gently pulling the small handle on the upper front of the left side of the instrument with the other hand.
5、 Precautions
1. In order to ensure the safety and centrifugal effect, the instrument must be placed on a firm, shockproof and horizontal table, and the force on the four legs should be balanced.
2. The room should be dry and well ventilated. The relative humidity should be kept below 80%. The indoor temperature should be between 5 ℃ and 40 ℃. There should be no corrosive substances, so as to avoid direct sunlight on the instrument.
3. Do not move the centrifuge and open the door cover during operation.
4. When the motor and rotor are not completely stopped, the door cover shall not be opened, and the rotor shall not be forced to slow down and stop ahead of time by hand (or other objects).
5. The power supply must be reliably grounded to ensure the safe operation of the instrument.
6. After separation, the instrument should be wiped clean in time, and the power switch should be turned off and the power supply should be cut off.
7. Take out the rotor with great care. The correct method is to use a non-metallic tool (such as a driver handle) or a copper rod to reach under the rotor, gently knock the rotor body upward from many places, and repeat until the connection between the rotor body and the motor shaft is loosened. It is strictly forbidden to pull up directly by hand after loosening the nut, so as to avoid damaging the flexible support of the motor.
8. Check the rotor, hanging cup (adapter) and centrifugal tube for cracks and aging, and replace them immediately if any.
6、 Warranty instructions
The instrument is guaranteed for one year. During the warranty period, if the instrument is damaged due to human factors and needs to be repaired by our company, appropriate repair fee shall be paid. See warranty card for details.
7、 Common faults and troubleshooting
The machine is equipped with a fault display window. When the machine fails, "time / fault" window will display E1 – – E6, with the following meanings:
E1 – – imbalance
E2 – – overspeed
E3 door not closed
E4 – – door open during operation
E5 – – stall
E6 – – setting error
In case of the above faults, except for E5 series control system failure which needs to be returned to the manufacturer for maintenance, other faults can be reset by the operator according to the correct method.
Other common troubleshooting methods are as follows:
|
Common faults |
reason |
Exclusion method |
|
After the power is plugged in, the display screen does not light up |
No 220 V power supply |
Check the power supply |
|
The fuse is blown |
replace |
|
|
The display shows 0000, press the start key and the machine will not run |
Circuit board or transformer damaged |
replace |
|
Control system connector loose |
Re insert |
|
|
Key damage |
Replace the panel |
|
|
Motor damage or leakage |
Maintenance or replacement |
|
|
It can run, but the speed can't go up. The machine has strange sound or peculiar smell |
Control system failure |
Send it to the manufacturer for maintenance |
|
The actual speed is inconsistent with the set or displayed speed, out of control or unstable |
Control system failure |
Send it to the manufacturer for maintenance |
8、 Transportation and storage of instruments
1. Centrifuges are packed according to the requirements of rain proof, moisture-proof and shock proof when leaving the factory, and they are firmly positioned in the packing box. Users are not allowed to invert the packing box or throw it down or collide violently in order to avoid damaging the instrument or accessories.
2. If the instrument is not used for a long time, the instrument should be packed according to the requirements of moisture-proof and shockproof (the motor shaft should be coated with a thin layer of grease), and stored in a non corrosive gas with a relative humidity of not more than 80% and a well ventilated room at - 5 – – 40 ℃.
9、 Unpacking and inspection of instruments
1. Place according to the "up" sign on the outer packing box, then open the packing box and take out the instrument.
2. Check and check the instruments and accessories according to the packing list attached in the box. If there is any error, please contact the supplier or contact our sales department directly.
Packing list
|
Serial number |
name |
Specification and code |
number |
remarks |
|
One |
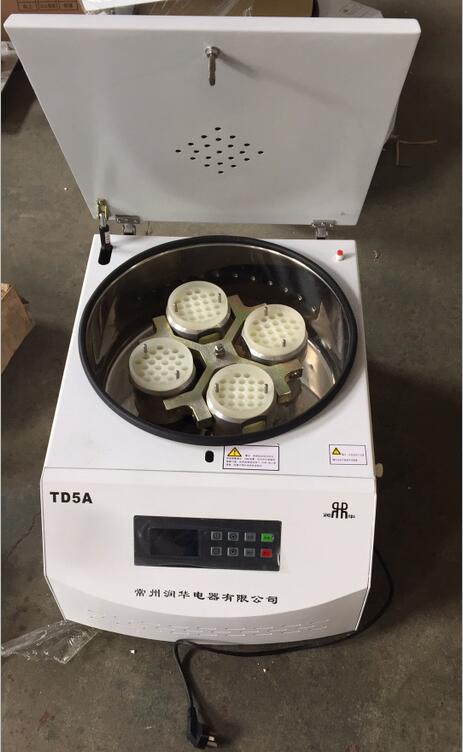
Table type low speed centrifuge |
TD5A |
1 |
|
|
Two |
Accessories and accompanying tools |
|
|
|
|
1 |
power cord |
|
1 |
|
|
2 |
Special wrench |
|
1 |
|
|
3 |
Horizontal rotor |
|
1 |
|
|
4 |
Aluminum hanging cup |
|
4 |
|
|
5 |
Adapter |
|
|
|
|
6 |
|
|
|
|
|
7 |
|
|
|
|
|
Three |
Random documents |
|
|
|
|
1 |
instructions |
|
1 |
|
|
2 |
certificate |
|
1 |
|
|
3 |
Packing list |
|
1 |
|
|
4 |
warranty card |
|
1 |
|
Welcome to the official website of Runhua Instruments. We are a professional manufacturer of laboratory instruments. Quality and reputation a…
The water bath constant temperature shaker is a biochemical instrument that combines a temperature controllable constant temperature water ba…
Series of biochemical incubators:Features of 150A biochemical incubator: the biochemical incubator has the function of cooling and heating tw…
High-precision stirring water bath produced by Runhua Instruments:1) The general water bath does not have the circulating stirring function. …
Maintenance and maintenance of electric mixer1. Correct use and attention to the maintenance of the instrument to keep it in good working con…
What work should be done in the use of digital display stainless steel electric heating plate? Digital display stainless steel electric h…